
Start today and get one month free.
Contents
We’re very excited to announce our latest feature: Transaction Tagging. With Transaction Tagging, you can tag transactions by a specific project, client, product, channel, service, location or line of business to get more detailed reporting.
When To Use Transaction Tagging
Tagging your transactions can help you better understand your business.
For example, you can see which of your products brings in the most revenue, which projects cost you the most money, or who your most profitable customer is. If you operate your business from various locations, transaction tagging can reveal which locations bring in the most money. Or if you’re a service-based business, transaction tagging can give you crystal clear insight into your profit and loss for each client or project.
How To Use Transaction Tagging
Transaction tagging can help you maximize profits.
Let’s say you’re a consultant. You have ten clients that you work with throughout the year. With ten clients, it’s a lot of work to manually keep track of how much money you make (and spend) on each client. With our new tool, you can simply tag each transaction with the client’s name, letting you easily view your profit and loss for each client. The result? A clear view of who your most profitable clients are, allowing you to narrow your focus on who you will serve in the future.
Here’s another example of how to use transaction tagging.
Imagine you’re an interior designer. You work with ten real estate agents that refer business to you. You might know off the top of your head which agent refers the most business, but you’re not sure which clients pay the most. Let’s say Lionel refers an average of twenty clients per month, whereas Monty refers an average of seven clients per month. It might seem like it’s most worthwhile to focus on building your relationship with Lionel.
However, by tagging your transactions, you discover that clients referred by Lionel pay around $500, whereas clients that come from Monty pay around $850. The numbers speak for themselves—by tagging transactions with client name, you discover that you can make more money by building closer ties with Monty.
These are just a couple of simple examples of how transaction tagging can help you get more strategic and grow your bottom line. We’ve put together a short user guide on how to get started. As always, if you have further questions, feel free to ask your bookkeeping team in your message feed.
Login to Bench now to get started.
User Guide to Transaction Tagging
Creating Tags
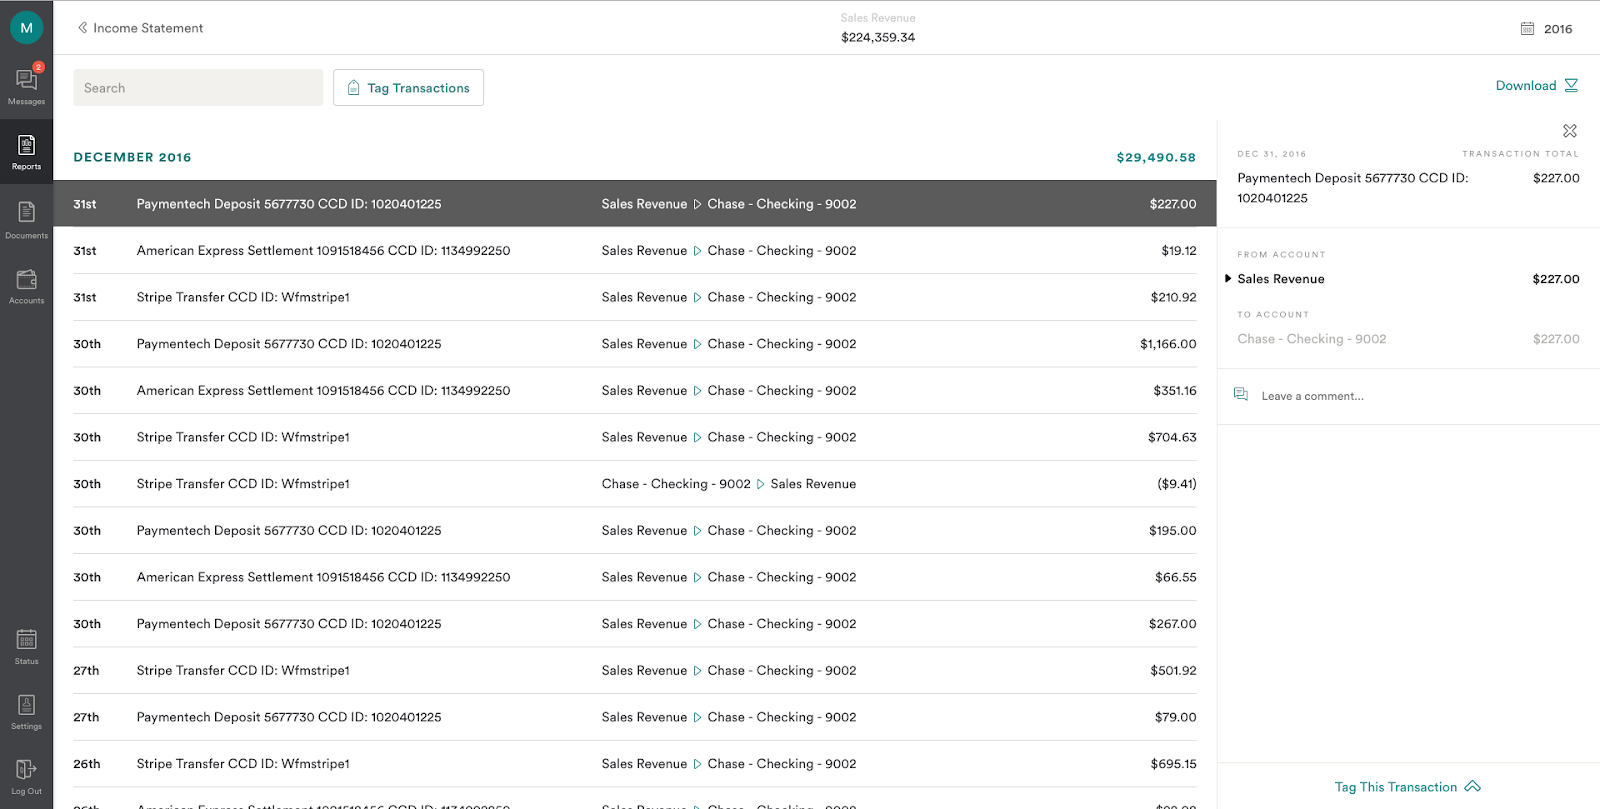
Step 1.
Expand the transaction sidebar while viewing the details of a transaction. You can access this tool by clicking “Tag This Transaction” in the bottom right corner.
Step 2.
Open the management screen to start defining tracking types.

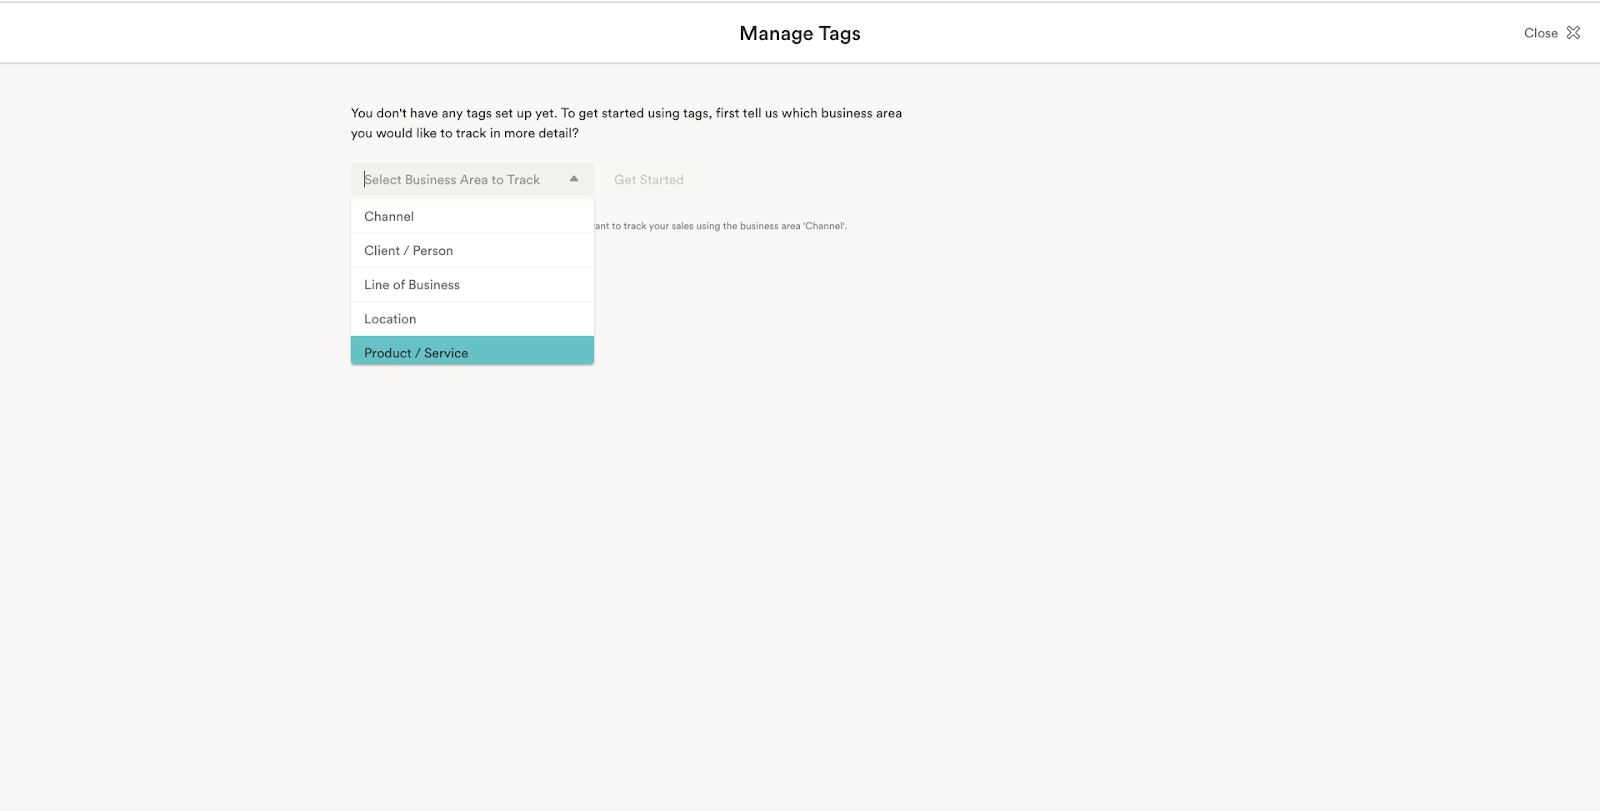
Step 3.
Select a tracking category from the list of options. Here are some examples:
- Channel: Distinguish between revenue collection methods.
- Client/Person: Track the profitability of your individual clients.
- Line of Business: Differentiate between your different business offerings.
- Location: Compare separate locations of your business.
- Product/Service: Understand profitability of different products.
Step 4.
Create a tag within the category
Repeat step 3 and step 4 for additional tags and types you would like to track.
Note: tags can also be added later within the transaction sidebar.

Applying Tags
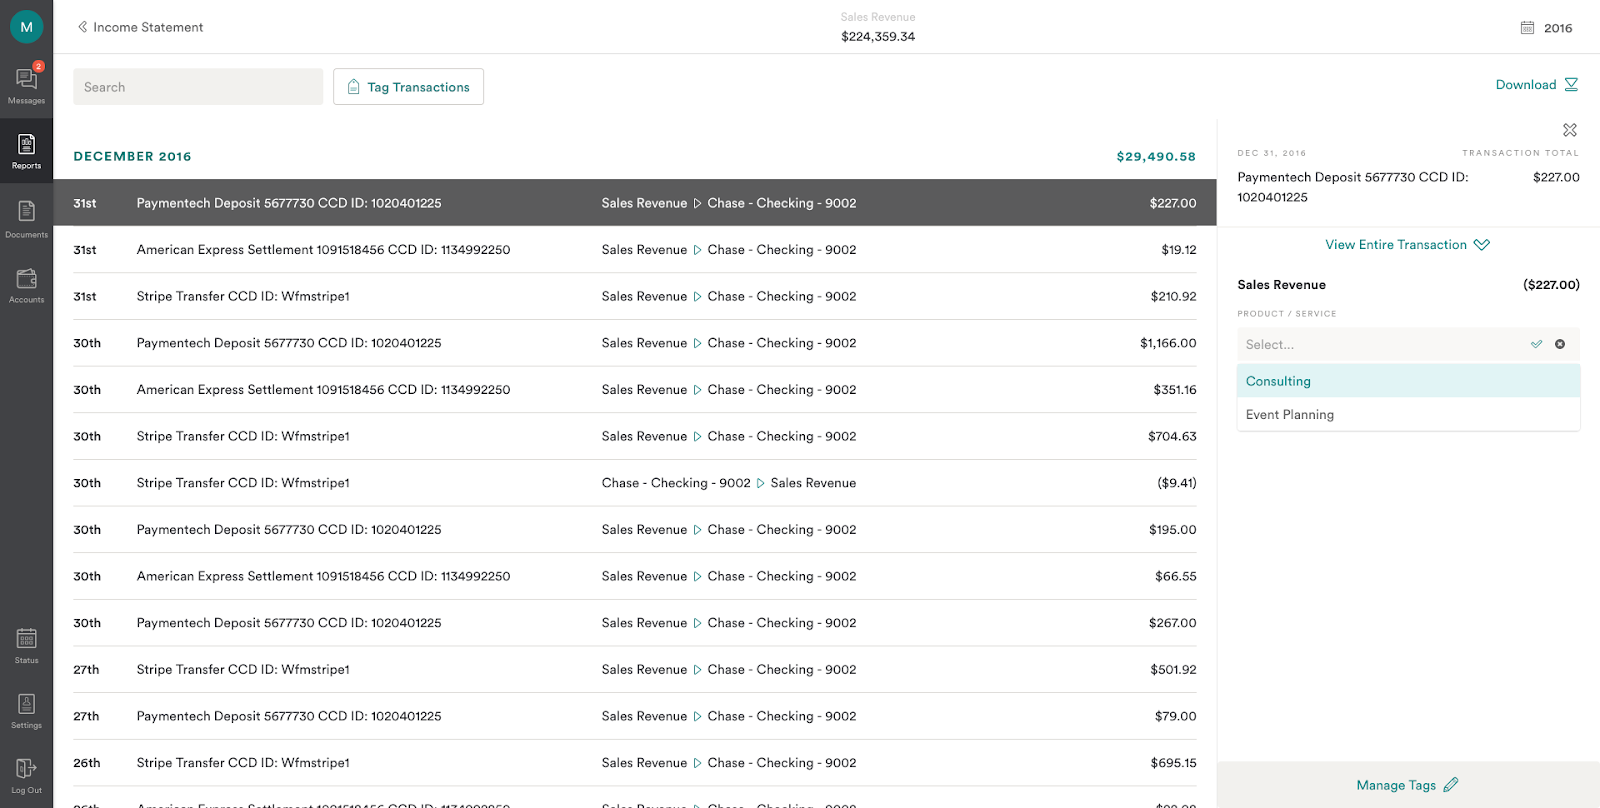
Now when you expand the transaction detail view, you will see the allocation sidebar.
You can start typing the name of a tag, and select it.
Bulk tagging
You can save time by tagging multiple transactions at once. Just click “Tag Transactions” and check off all the transactions you’d like to associate with a single tag.
You can also tag all transactions in a view by checking “Select all transactions on page.”

Accessing Reports
Step 1.
When viewing your main income statement, click “Select Business Area” and choose what you’d like to view.
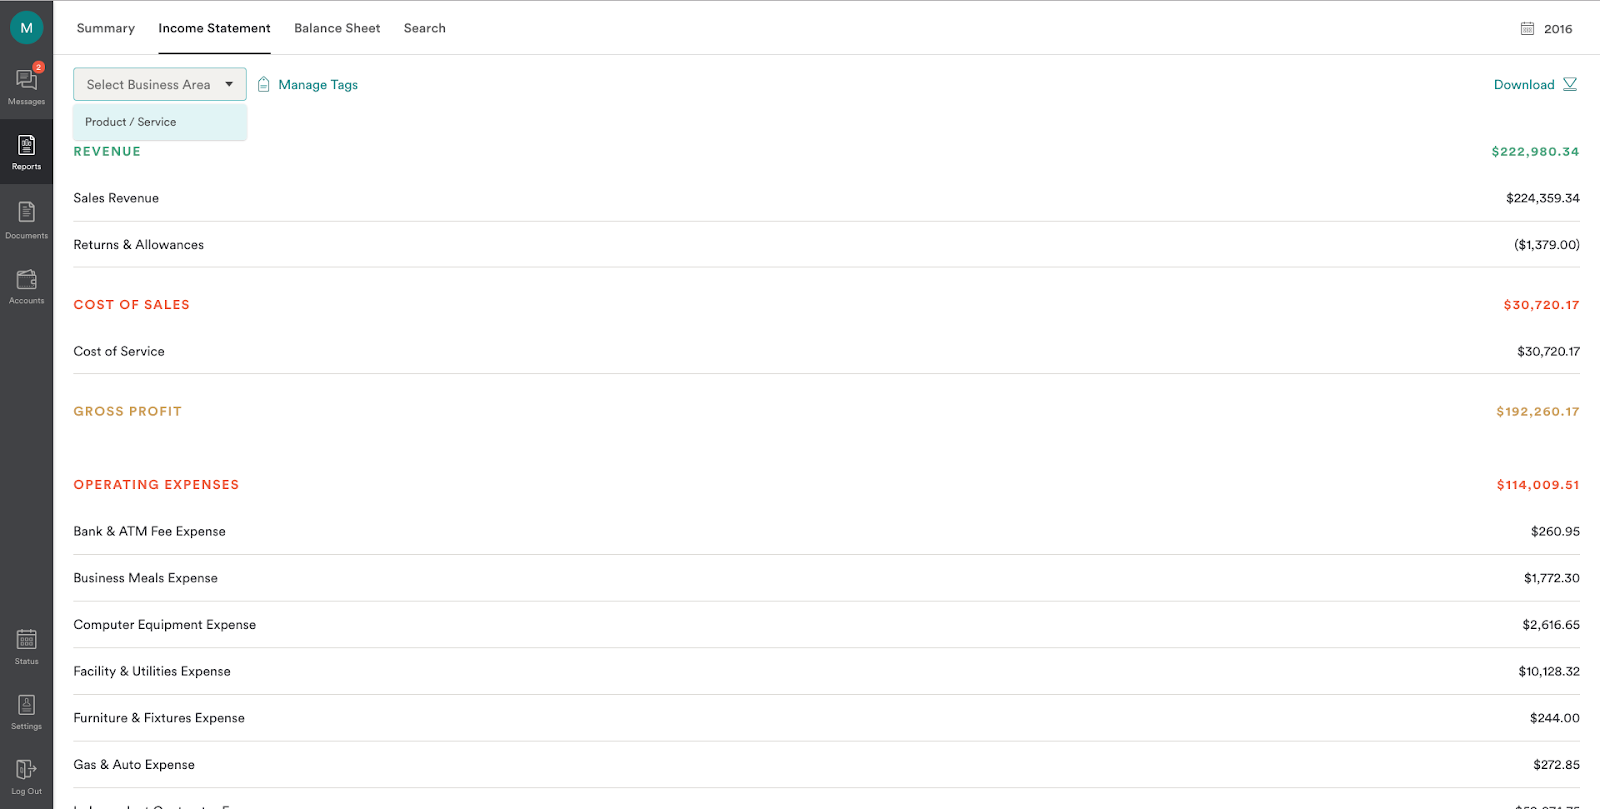
Step 2.
Once selected, you will be able to view split income statements based on your selected tags.

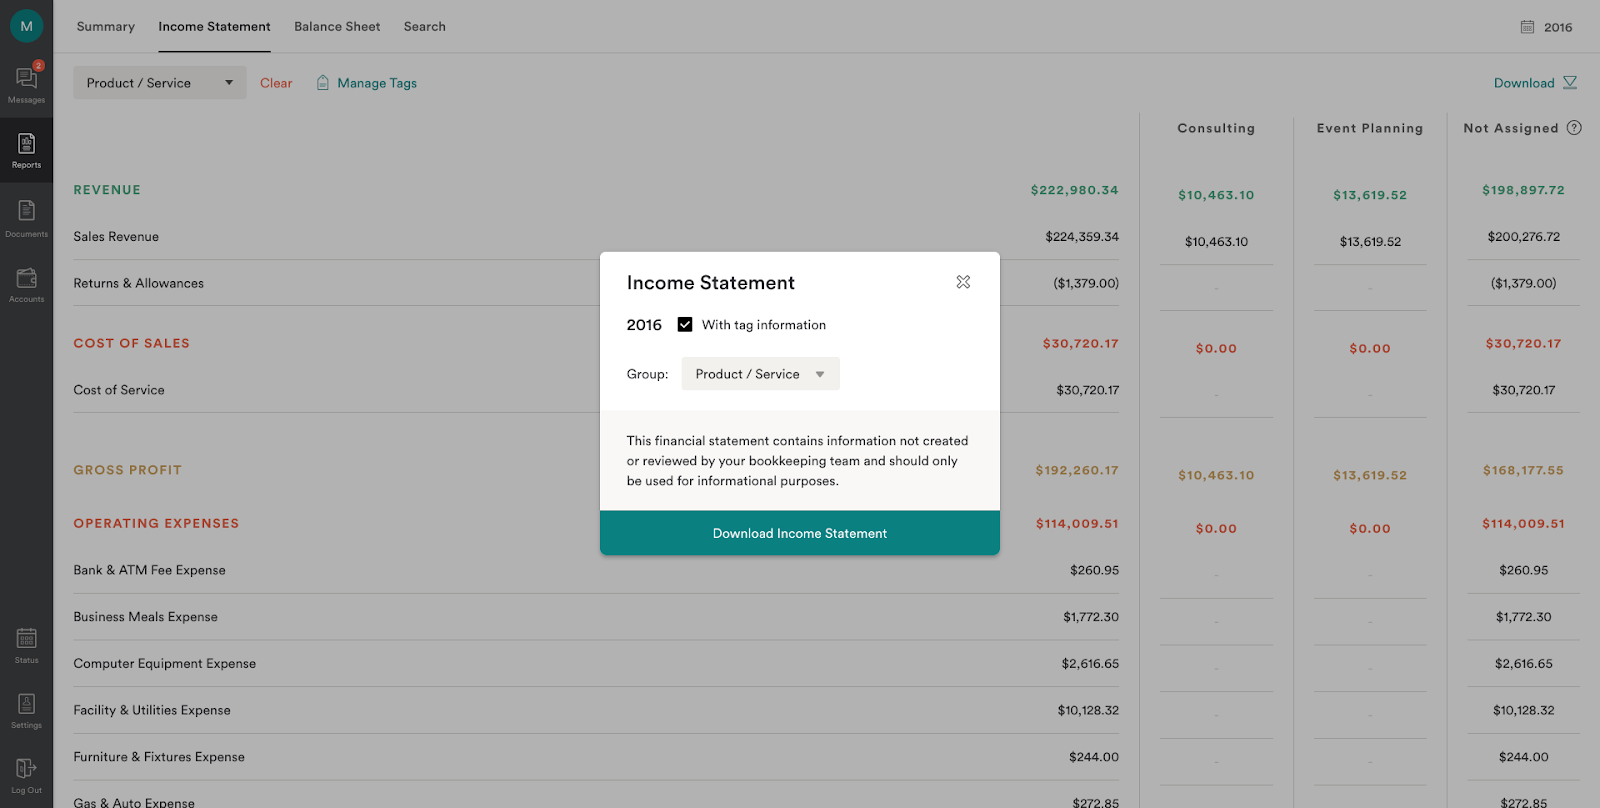
Step 3.
Download report exports are viewable with tags based on what you’re looking for.
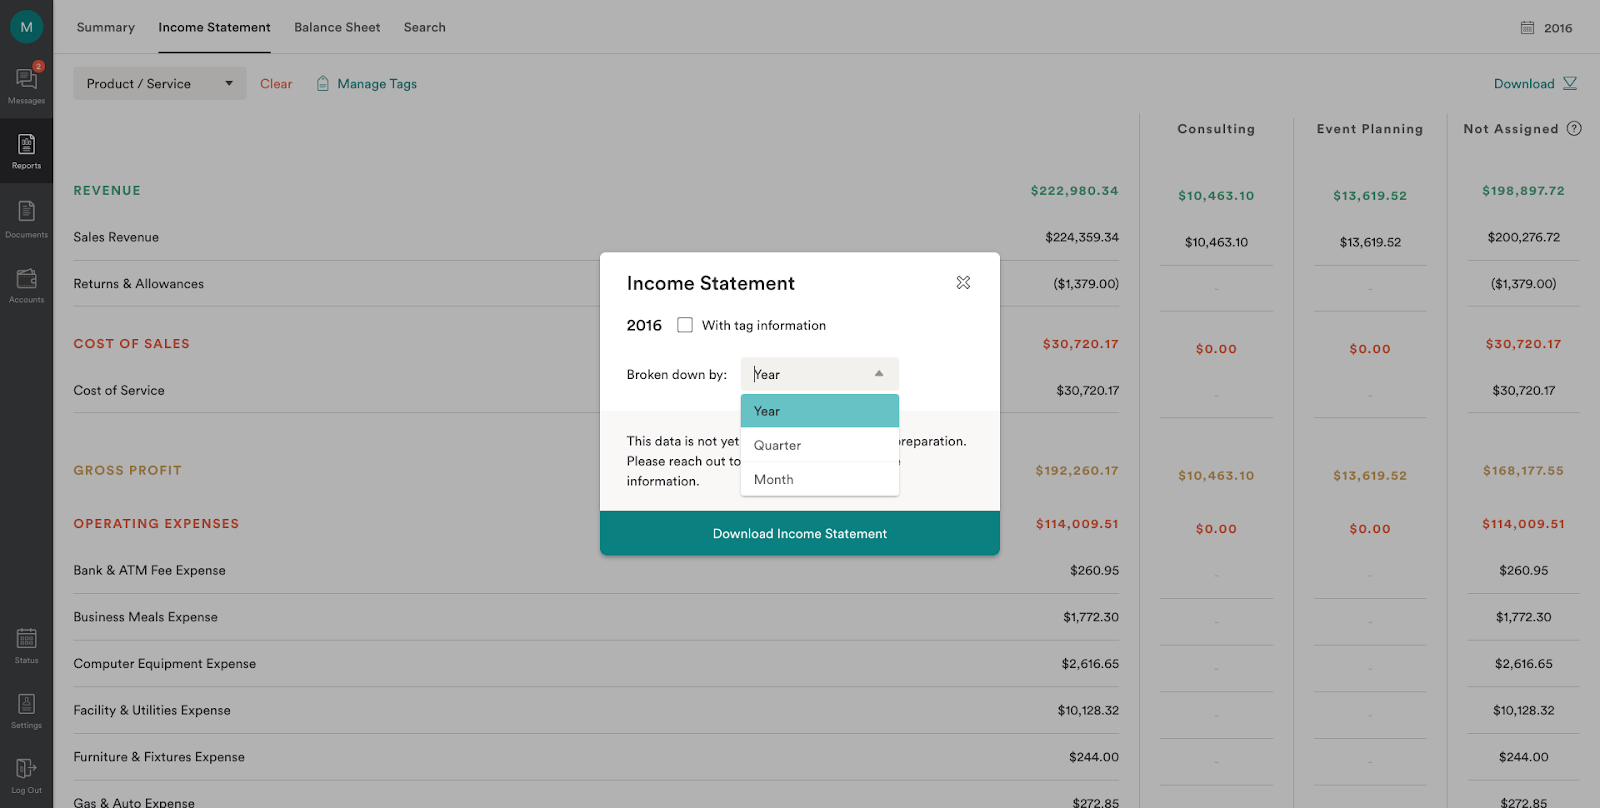
By unchecking the year option, you can choose to download the Income Statement by year, quarter, or month.
Login to Bench now to get started.
